
Build a course
A course is your written teaching plan — the modules, the lessons and the practice questions. You describe what you want, Lumi drafts it, and you edit it until it is yours.
Before you start
What you need
- An approved teacher account.
- A clear idea of the subject and who it is for.
- About an hour, mostly spent reading and editing what Lumi drafts.
What you will have
- A full course outline with modules and lessons.
- Practice material your students can work through.
- A course you can attach to as many classes as you like.
Do you need a course?
Not always. You can run a perfectly good class with no course at all, teaching from your own notes and building each week’s material as you go.
| Build a course when… | Skip it when… |
|---|---|
| You will teach the same subject to more than one group. | This is a one-off workshop. |
| You want students to have practice material to work through on their own. | You already have your own worksheets and slides. |
| You want a ready-made pool of questions to pull homework from. | You are still working out what the class will cover. |
If in doubt, build one. It takes an hour and it saves you the weekly scramble for material later.
Details
Open Courses and start a new course. The first screen is where you tell Lumi what to write. These settings matter more than anything else you will do here, so it is worth being specific.
| Setting | What it does | Advice |
|---|---|---|
| Topic | The subject of the course. | Be specific. “Halves and quarters for 8–10 year olds” produces a far better outline than “Maths”. |
| Category | Which shelf the course sits on, such as maths, English, science or creative arts. | Pick the closest. It affects how the course is presented, not what is in it. |
| Goal | What a student should be able to do by the end. | Write it as an outcome: “can share a whole into equal halves and quarters”. |
| Depth | How hard the material gets: Basic, Intermediate, Expert, or Custom. | Match it to the students, not to your own level. Most school classes are Basic or Intermediate. |
| Thoroughness | How much ground it covers: Crash, Medium or Thorough. | Crash is a quick tour. Thorough covers the subject properly and takes longer. Medium suits most terms. |
| Audience | Who this is for, in your own words. | “Children aged 8–10 who can count and add small numbers” is exactly the right level of detail. |
| Modules | How many big chunks the course is split into. Between 1 and 12. | One module per two weeks of class is a sensible rule of thumb. |
| Lessons per module | How many lessons inside each chunk. Between 1 and 6. | Three or four keeps modules a comfortable size. |
When you are happy, click Generate curriculum. It takes a minute or two.
Curriculum
Now you get the outline: every module, and every lesson inside it. Read it properly. This is the moment to fix things, because everything after this is built on top of it.
Look for:
- Anything missing. Does it cover what you promised in your goal?
- Anything in the wrong order. Does lesson 4 assume something that is not taught until lesson 6?
- Anything that is not yours. If a lesson is not how you would teach it, retitle it or rewrite the description.
You can edit the module and lesson titles and descriptions directly here.
Materials
With the outline agreed, Lumi fills in the actual teaching material — lesson by lesson, with practice for students to try. You generate these one lesson at a time so you can check as you go rather than being handed a hundred pages at once.
Publish
The last step checks the course is complete — including the final quiz — and then releases it so it can be attached to your classes.
The Publish button stays greyed out until the course has passed its quality check. If it will not let you publish, submit the course for quality approval first; the button’s tooltip tells you which of the two is missing.
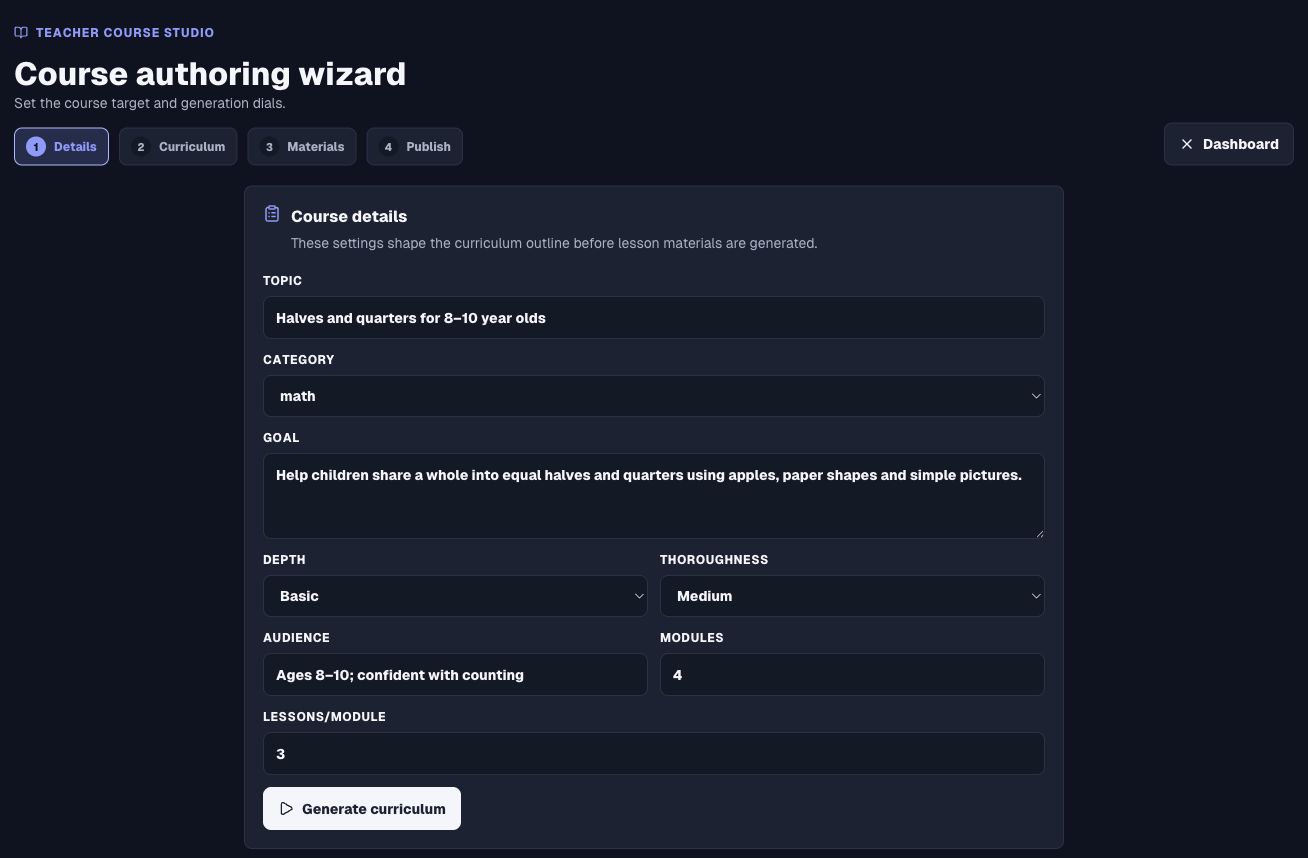
Step 1 · Details — Tell Lumi the subject, the audience and how deep to go.
Preview before you publish
Every course has a preview that shows you exactly what a student sees, without touching anyone’s real progress. Open your course from the list and choose the preview link.
It is worth ten minutes. Reading your own course as a student is the fastest way to spot a lesson that assumes too much or a practice question with a confusing wording.
Access and pricing
The Access & pricing panel controls who can see the course. There are two choices.
| Setting | Who can see it | Use it for |
|---|---|---|
| Public | Anyone browsing the catalogue. | A course you are happy to have discovered by learners you have never met. |
| Private | Only you and the members of the class you link it to. | Course material written for your own students, that you do not want in the public catalogue. |
If you choose private, you can enter the class it belongs to so your students get access automatically.
Share a course
Public courses can be shared with a link. Anyone who opens it can take the course on their own account. Private courses cannot be shared this way on purpose — that is what makes them private.
For teaching, you usually do not need the share link at all: attaching the course to your class gives your students access, and that is covered in the next guide.
Can I change a course after students have started?
Yes. Courses are living documents — you can keep editing lessons and adding material while a class is running. Students see the current version.